Showing posts with label #dsp. Show all posts

Friday, 4 July 2025

Embrace Beautiful Gallery for July's Lets Craft Together Blog Hop

 Welcome back to another Let's Craft Together Blog Hop! This months theme is RUSTIC themed.

I have created a scrappy card with strips from the DSP pack Beautiful Gallery. You could say I couldn't just pick one sheet to work with as they are ALL beautiful and rustic!

Here's the challenge picture
Lets take a closer look at this card.

I really love how the strips, although being very different still do compliment each other so well when laid out together. These strips were the 'leftovers' from a series of cards I was making - see below for the unfinished culprit cards. 
The sentiment and arch dies are from this stamp/bundle - Everyday Arches
The sentiment is stamped in the new InColour Secret Sea, on Cloud Cover cardstock. 
Heres the set of cards that left me with quite a few strips!
I really couldn't bring myself to cover the front with anything... the paper really does sing on its own!
Which is your favourite? 
This cards design is always fun and a great way to make use of what may otherwise end up in the bin. 
Be sure to continue on the hop below!

Thanks so much for stopping by and hopefully I have inspired your creativity. I love reading your comments, be sure to leave me a quick hello below! 
Monday, 7 April 2025

Adventurous Sky Planes with Shy Shamrock

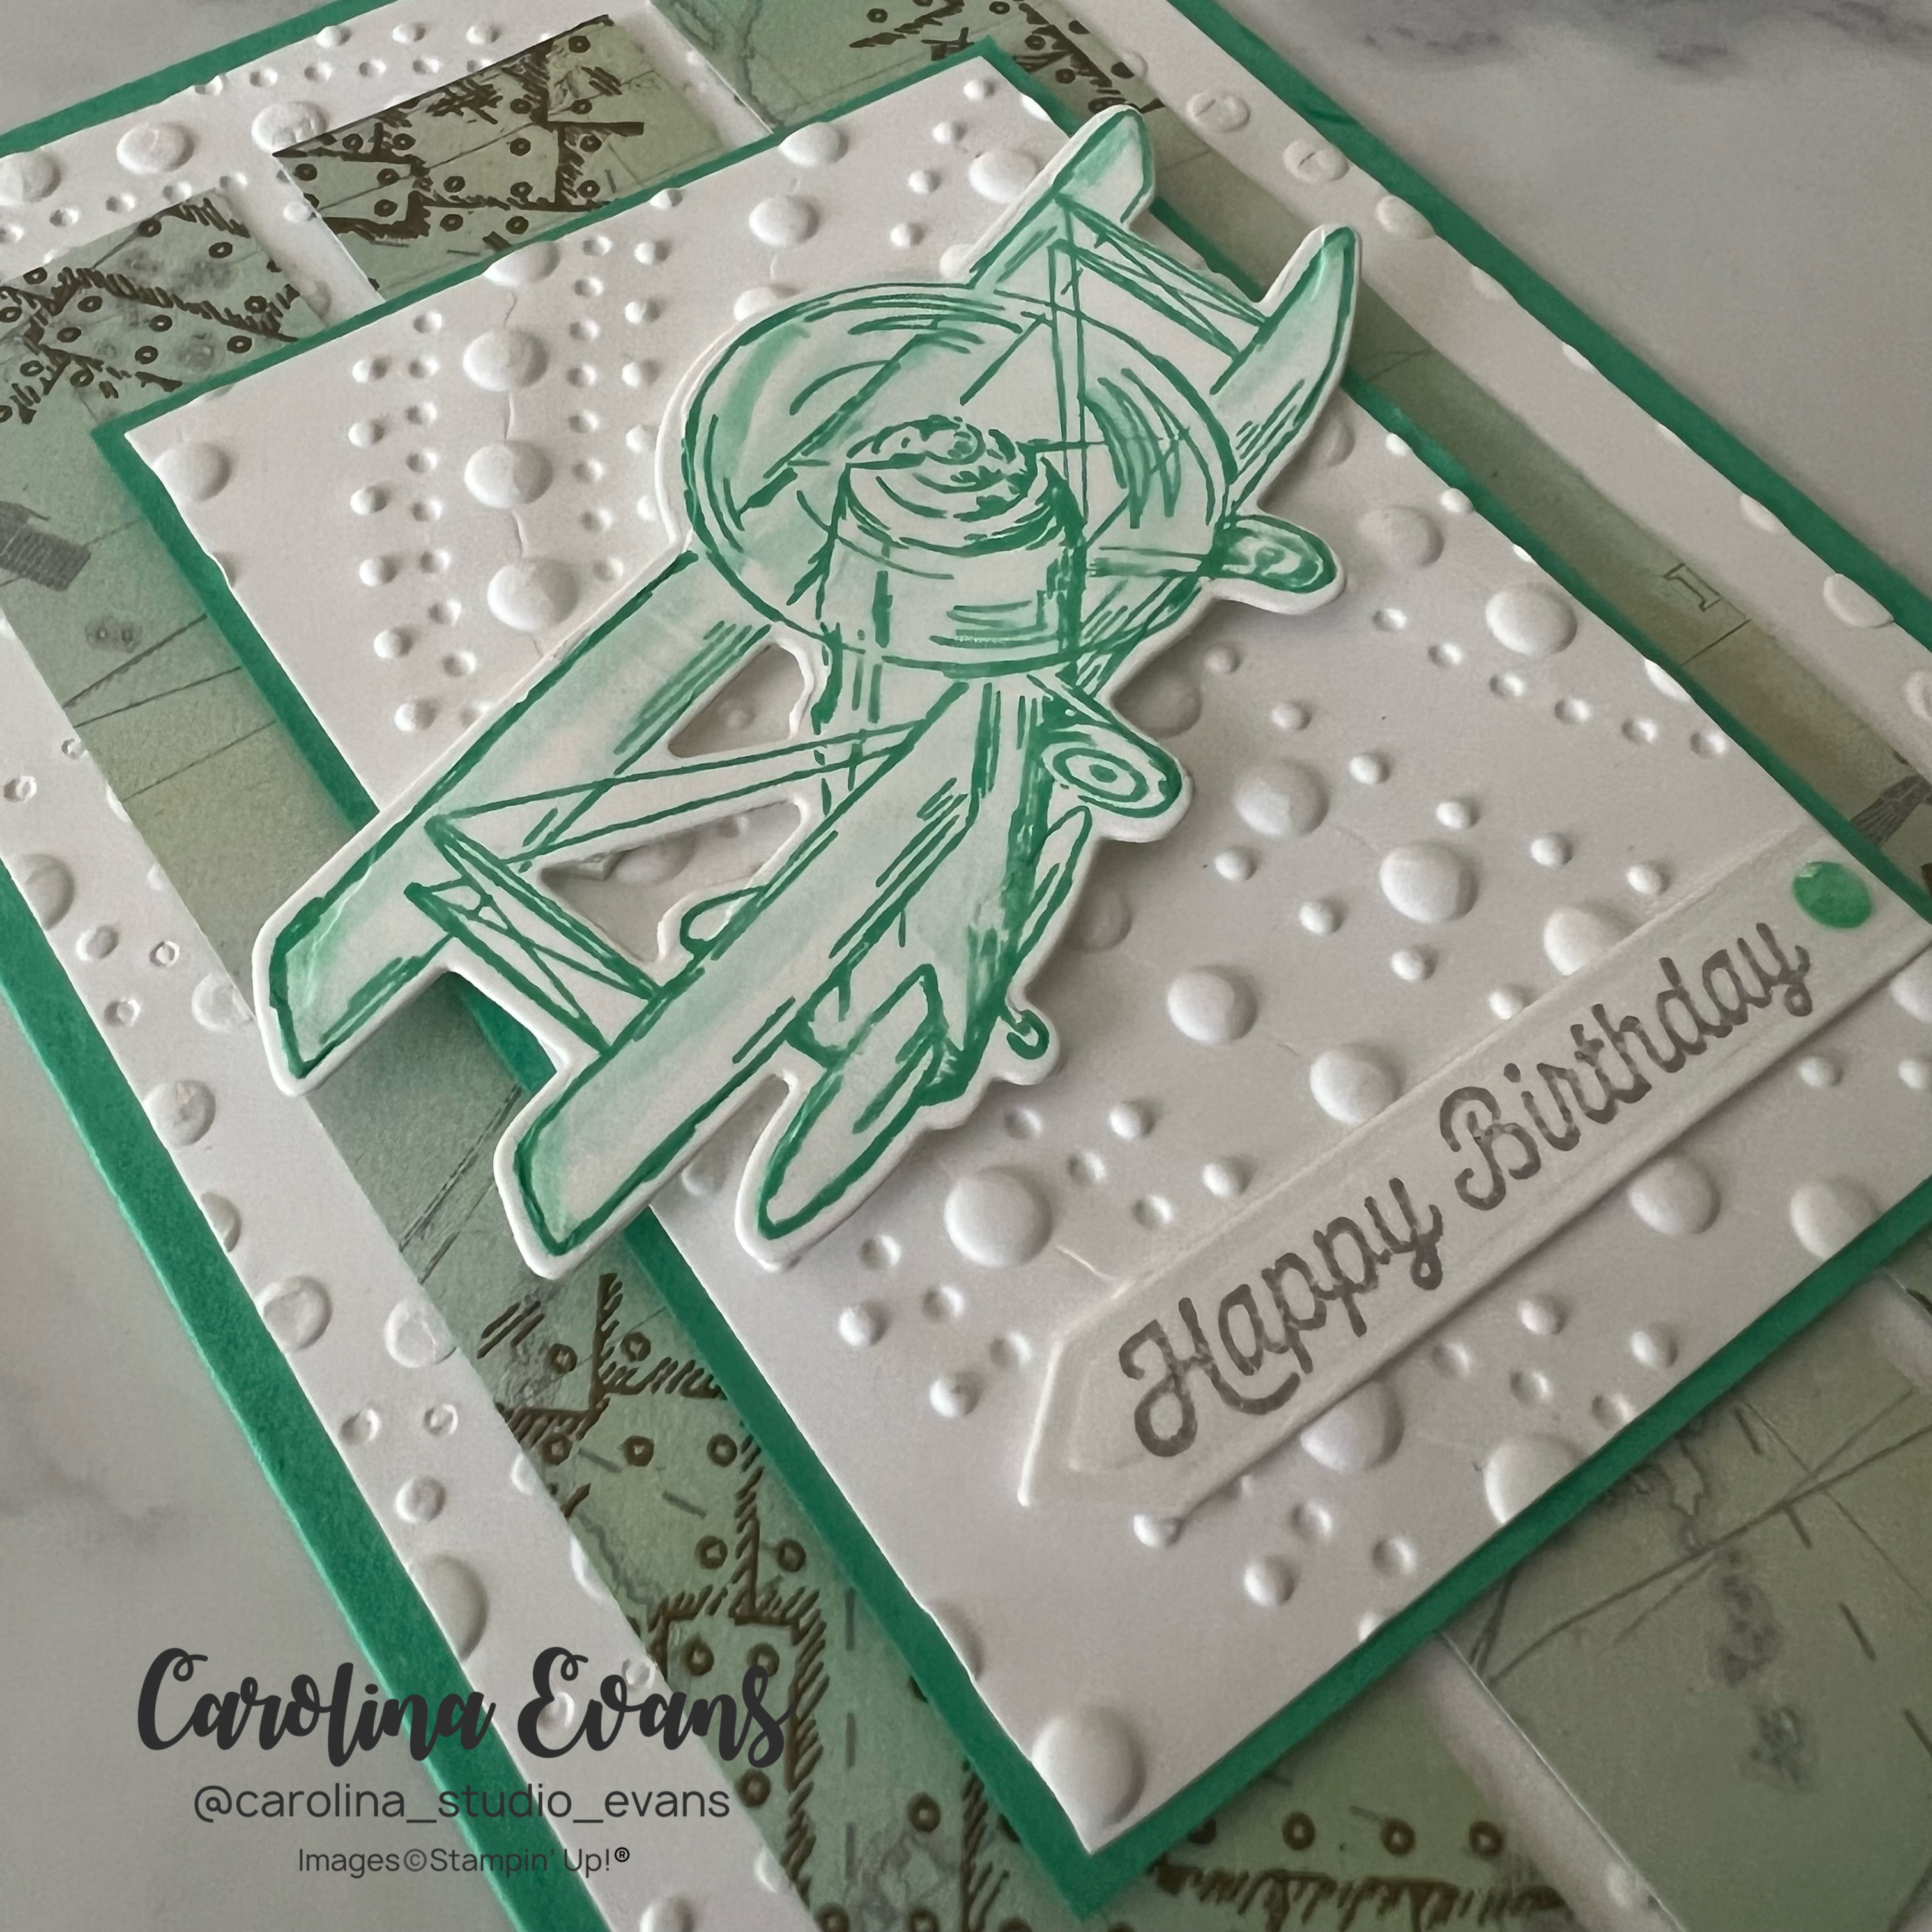
Today I'm sharing a cool plane card I made for a friends birthday. They love planes and the colour green so I went with that as my starting point!

The first layers to prepare is the Shy Shamrock card base (1/2 A4, scored at 10.5cm)
Next is the 3D Dotted Circles embossed background panel (10cm x14.5cm)

You'll also need x3 strips of DSP (2.5cm x 12.5cm each) 
I cut my DSP strips from Take to the Sky (Adventurous Sky Suite) and I added some subtle colour with a a blending brush, as the paper is originally a soft grey. Always remember to slowly build the colour when blending, previous referred to as daubing or sponging, you can always add more colour but you cant remove it. 
To my DSP strips I also gold embossed the rivet panel stamp image to the edges, again another subtle element.

The final steps are to create a frame for the plane to sit in front of
Shy Shamrock cardstock (7cm x 9.5cm) & Basic white also embossed with Dotted Circles (6.5cm x 9cm)
Stamp your aeroplane from Adventurous Sky onto Basic White in Shy Shamrock ink and gently 'drag'n the colour into the white spaces using a Blender pen.
I never forget the inside,  even if its just adding a couple of stamped images to carry the them thru. 
Thanks so much for stopping by and hopefully I have inspired your creativity. I love reading your comments, be sure to leave me a quick hello below! 

Monday, 20 January 2025

Lavender Garden Meadow Fun Gate Fold

 Today I'm sharing this awesome Fun Gate Fold with Belly band card. I already knew I wanted to use the Lavender DSP and I've always loved green so it was an easy choice to combine it with purples for this card. 

Lets take a closer look. I stamped and die cut the wheelbarrow and began colouring with my Stampin' Blends in all the cardstock and DSP colours. This makes combining any image a BREEZE to your project especially when you want to mix and match things up. 

The gate fold was easy too. Here in Australia our cardstock is 8-1/4" wide, so to make a perfect gate fold trim your cardstock down to 8" and score at 2" & 6". You will hardly be able to tell the slight difference. I've folded the top 2 corners over for a different look.
I really love interactive cards and a card with a belly band is like unwrapping a gift!
Simply wrap your card stock strip around the card making sure the 2 ends meet on the front, your label will then cover up the join. Don't make it too tight or it will make your card difficult to take out.
This bundle is so cool, I have used it many times for both feminine and masculine cards. 
Thanks so much for stopping by and hopefully I have inspired your creativity. I love reading your comments, be sure to leave me a quick hello below! 

Monday, 13 January 2025

Ocean Friends - CASE'd from Melissa Faust

 Today I'm sharing another beautiful card that I CASE'd from Melissa Faust. I loved her layout and design I had to use it at a recent class I held. My students loved it! Thank you Melissa for such a great card design. 

Lets take a closer look at this card. I added some extra layers to Melissas design including the vellum circle cut out which I stuck behind the lobster, the background DSP is busy and needed a 'buffer'. I also added the Lemon Lime Green seaweed poking out from beneath the DSP panel.
The inside carries the theme thru with stamped crabs, bubbles and extra seaweed.
Overall I love this bundle and dsp, they work on all levels and for all occasions
Heres my set up for class
The packs are ready to be packaged up
Thanks so much for stopping by and hopefully I have inspired your creativity. I love reading your comments, be sure to leave me a quick hello below! 

Monday, 6 January 2025

Fun Fold with Ocean Friends

Todays card is all about the bright and beautiful Oceans Friends bundle and DSP! I'm in love with Mr Crab - he's adorable dont you think?

I'm obsessed with this set, the colour combination from the DSP is so funky and bright. 
The main colours I used are Berry Burst, Pumpkin Pie, Lemon Lime Twist & Coastal Cabana.
This is actually a fun fold card! 
How to create a COLUMN CARD:
1) take a 1/2 sheet of A4 and score @2,4,6 and 8"
2) glue into a box, with 4 sides
3) decorate x3 of the panels with DSP - Frames 1-7/8"x 5-5/8"/ Panels 1-3/4"x 5-3/4"
4) add a writing panel on the 4th side in Basic White cardstock 
I added an extra large writing panel - the card I cased had a panel 1-3/4"x 5-1/2" 
Mine is still a standard card size, measuring 3-3/4"x 5-1/2"
This bundle is so fun and I love the large shapes and dies. This is also a 2 step stamp set which means you can create Mr Crab and Mr Lobster in any colour combination you like!
Thanks so much for stopping by and hopefully I have inspired your creativity. I love reading your comments, be sure to leave me a quick hello below! 

Friday, 13 December 2024

3D Stand up Fancy Christmas Card with Snowy Scenes DSP

Today I'm sharing with you a FANCY FANCY christmas card! This card is not for the light hearted, you are going to be using LOTS of your treasured DSP, I mean LOTS!

Begin with creating the base, you will need x2 1/2 A4 sheets, glued together to create a 3 panel card. 
It should look like this when it stands up
Decorate x5 panels with a combination of embossed cardstock and a sheet of DSP.
You will need x5 cardstock pieces measuring 5cm x 14.5cm each (dont forget to emboss these) & the same for x5 DSP sheets measuring 5cm x 14.5cm each
For the 6th panel - the centre writing panel - add a panel of Basic White 10cm x 14cm
Keep decorating all the way around, add stamped images or punched out greeting, enjoy!
Thanks so much for stopping by and hopefully I have inspired your creativity. I love reading your comments, be sure to leave me a quick hello below!