Showing posts with label Remarkable You. Show all posts

Monday, 7 September 2015

Remarkable You've Got This for #GDP001

I'm really excited to be supporting my very good friends Kylie & Louise with a their new super cool challenge blog - Global Design Project. I'd love for you to click on over, join in the fun and spread the word too!

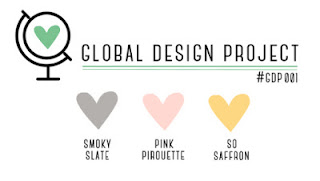
They've kick started with a gorgeous colour challenge #GDP001
http://www.global-design-project.com/2015/09/global-design-project-gdp001.html

I have used a new ink today and I love it. NEW  to our colours is Basic Gray Archival Ink (also available in Basic Black eeeek!) - a permanent ink perfect for watercolouring. I realised after I stamped my lotus flower from 'Remarkable You' that I hadn't stamped it on the recommended watercolouring papers.. opps! I went with it anyways!
I very carefully loaded up my aqua painter with ink from the ink pads and without squeezing any extra water out, I crazily, randomly & carelessly coloured each flower - that was fun!


Here are the card measurements so you too can create this card:
  • Standard Australian C6 card base in Whisper White Thick Cardstock (half A4 sheet)
  • Whisper White Panel -  3-3/4" x 5-1/2"
  • Coloured Frame Panels - 2" x 3-7/8"(glued overlapping to get the perfect frame!)
  • Coloured Strips -3/4" x 3-3/4"
If you love this colour combination too, please feel free to share and pin it!

Stampin' Up! Supplies
Built for Free Using: My Stampin Blog
 Thanks for stopping by today
http://www.global-design-project.com/


Thursday, 13 August 2015

Remarkable You - Lotus Flower WOW

I hope you like todays card. I was meant to post it last week along with one of the many challenges I like to play along with and I totally got the dates mixed up! No matter I still wanted to share my creation with you. We took a break from our crazy lives and took the kids to the Melbourne Zoo recently - their favourite track is the one that take you along to see the Elephants. So ever so quickly I whipped out my card and took a picture while the lighting was just perfect!

Carolina's Tip's & Techniques
Make the Lotus flower POP right off your card by covering it with Crystal Effects! I added up to 3 coats for this flower - make sure you allow enough time between coats to allow each layer to dry properly.
My gorgeous upline Kylie recently created a video where she showed a sentiment shadowing technique. This technique is effortless. I stamped the greeting in a nice dark colour first (Blackberry Bliss) then with a light shade (Smoky Slate) I stamped again, over the top and slightly off to one side to create a 'shadow' look. I love it - here you can see the difference it makes. 
  Here are the card measurements and the colours I used so you too can create this card:
  • Standard Australian C6 card base in Bermuda Bay Cardstock (half A4 sheet)
  • Crumb Cake Frame - 2-1/4" x 5-1/4"
  • Whisper White Panel -  2" x 5"
Stampin' Up! Supplies
Built for Free Using: My Stampin Blog
Thanks for stopping by today

Saturday, 8 August 2015

Remarkable You - Large Triple Flower #SIP8

Yesterday I showed you a pretty card using my new Remarkable You stamp set. The sketchy flowers are so gorgeous and this time I watercoloured this one with my aqua painter in Watermelon Wonder! You might be asking yourself "I haven't seen that flower image?" Well how cool is this - I layered x3 of the magnolia's into a flower, have a closer look below. To add a bit more fun I used my Watermelon Wonder marker to colour in the sentiment.
I was quite chuffed with this card I thought I would enter it over at Stamp Ink Paper.
This weeks challenge is...
http://stampinkpaper.com/

Here is my card with a beautiful matchy envelope too.
  Here are the card measurements so you too can create this card:
  • Standard Australian C6 card base in Watermelon Wonder Cardstock
  • Basic Black Frame - 3-3/4" x 5-1/2"
  • Vanilla Designer Paper - 3-5/8" x 5-3/8"
  • Banner Very Vanilla - 1-1/4" wide


I've added this colour swatch that features the colours on my card. Please feel free to pin it to your pinterest boards!

Stampin' Up! Supplies
Built for Free Using: My Stampin Blog
Thanks for stopping by today, hope you liked my card

Friday, 7 August 2015

Remarkable You - Magnolia Card #MOJO409

Its been ages since I created a card. Life is just getting in the way - you know that feeling right? So today I have created a real gem for you and entered the card into the popular MOJO Monday Challenge!

Here is the inspiration sketch
http://mojomonday.blogspot.com.au/2015/08/mojo-monday-409-contest.html

Here is my card, please read on for a few techniques and tips and the card measurements!

I started off my stamping this beautiful flower in Soft Suede from 'Remarkable You' onto a pretty designer sheet from the English Garden DSP pack. Then I partly coloured it with my Blushing Bride Stampin Write marker - how awesome does it look!? I stamped the dots from 'Work of Art' and the greeting comes from the Exclusive 'Watercolor Wishes Photopolymer Stamp set'.

I want to Thank Stampin' Up! for this beautiful stamp set - which I actually earnt for free in the recent #punchitup competition. Thank you so much I love it!


 Here are the card measurements so you too can create this card:
  • Standard Australian C6 card base in Whisper White Thick Cardstock
  • Pear Pizzazz Frame - 3-5/8" x 5-3/8"
  • Whisper White Background - 3-1/2" x 5-1/4"
  • Soft Suede Frame - 2-1/2" x 3-5/8"
  • Shimmery White (inked with Blushing Bride) - 2-3/8" x 3-1/2"
  • Banner Blushing Bride - 1" wide
  • Banner Very Vanilla - 7/8" wide 

I'm always looking for ways to 'step up' my creations and I felt that I wanted a more real flower feel so I added some more dimension to this top petal - there's some photos below to show you what I did.
 
Opps, we're all human right? I actually stuck the DSP on my envelope the wrong way round.
Here's my Envelope tip!
I've added this colour swatch featuring the colours I have used Please feel free to pin it to your pinterest boards!
 

Stampin' Up! Supplies
Built for Free Using: My Stampin Blog
Thanks for stopping by today