Showing posts with label 2015 Holiday Catalogue. Show all posts

Tuesday, 8 December 2015

Flurry of Wishes - Two Ways

I have 2 cards to share with you today and they both have been created with a beautiful bundle set Flurry of Wishes. I am happy to say has been carried over into the new year and will be around until at least 31st May 2016! Both cards are very easy to make with simple panels and simple stamping.

Here is the Rich Razzleberry version with a rectangular panel in the centre.I love the subtle snow like background created with the Softly Falling Textured Embossing folder.

Here is my Island Indigo Version with Oval cut outs (Oval framelits) and embellished cuts to the corners with the Curvy Trio Punch - so elegant!
 Here are the card measurements so you too can create these cards:
  • Standard Australian C6 card base in Rich Razzleberry (half A4 sheet)
  • Very Vanilla Frame - 3-3/4" x 5-1/2"
  • Rich Razzleberry Frame  - 2-5/8" x 4-1/8"
  • Very Vanilla Panel - 2-1/2" x 4"
Get inspired with this colour swatch, feel free to share and pin it!

Stampin' Up! Supplies
Built for Free Using: My Stampin Blog
Thanks for stopping by and thank you for all your wonderful encouraging comments!

Monday, 7 December 2015

Simple and Stunning Silent NIght

If you need some christmas cards in a hurry, read on - these cards is a super simple and quick card to create! We recently made a stack of these cards with some friends and they turned out beautiful.
My colour choice is semi-traditional with the white and navy, I wanted a third colour. A bluey colour to just lift the card up.  So I chosen Lost Lagoon as my background colour - and I love it! It frames this night time scene beautifully you could change it up and add a white panel - this would look stunning too! Just a simple stamped greeting and a wooden snowflake embellishment to finish it off and you're done!

I really hope to see more Edgelit style dies in the future this have been so fun to create with and super easy to make a card look amazing. Just a simple stamped greeting and a wooden snowflake embellishment to finish it off and you're done!

  Here are the card measurements so you too can create this card:
  • Standard Australian C6 card base in Sahara Sand Cardstock (half A4 sheet)
  • Lost Lagoon Frame - 3-3/4" x 5-1/2"
  • Night of Navy Panel -  3-1/2" x 5-1/4"
  • Whisper White Panel - 3-1/2" x 2"
Get inspired with this colour swatch, feel free to share and pin it!

Stampin' Up! Supplies
Built for Free Using: My Stampin Blog
Thanks for stopping by and thank you for all your wonderful encouraging comments!
Merry Christmas Everyone!

Friday, 20 November 2015

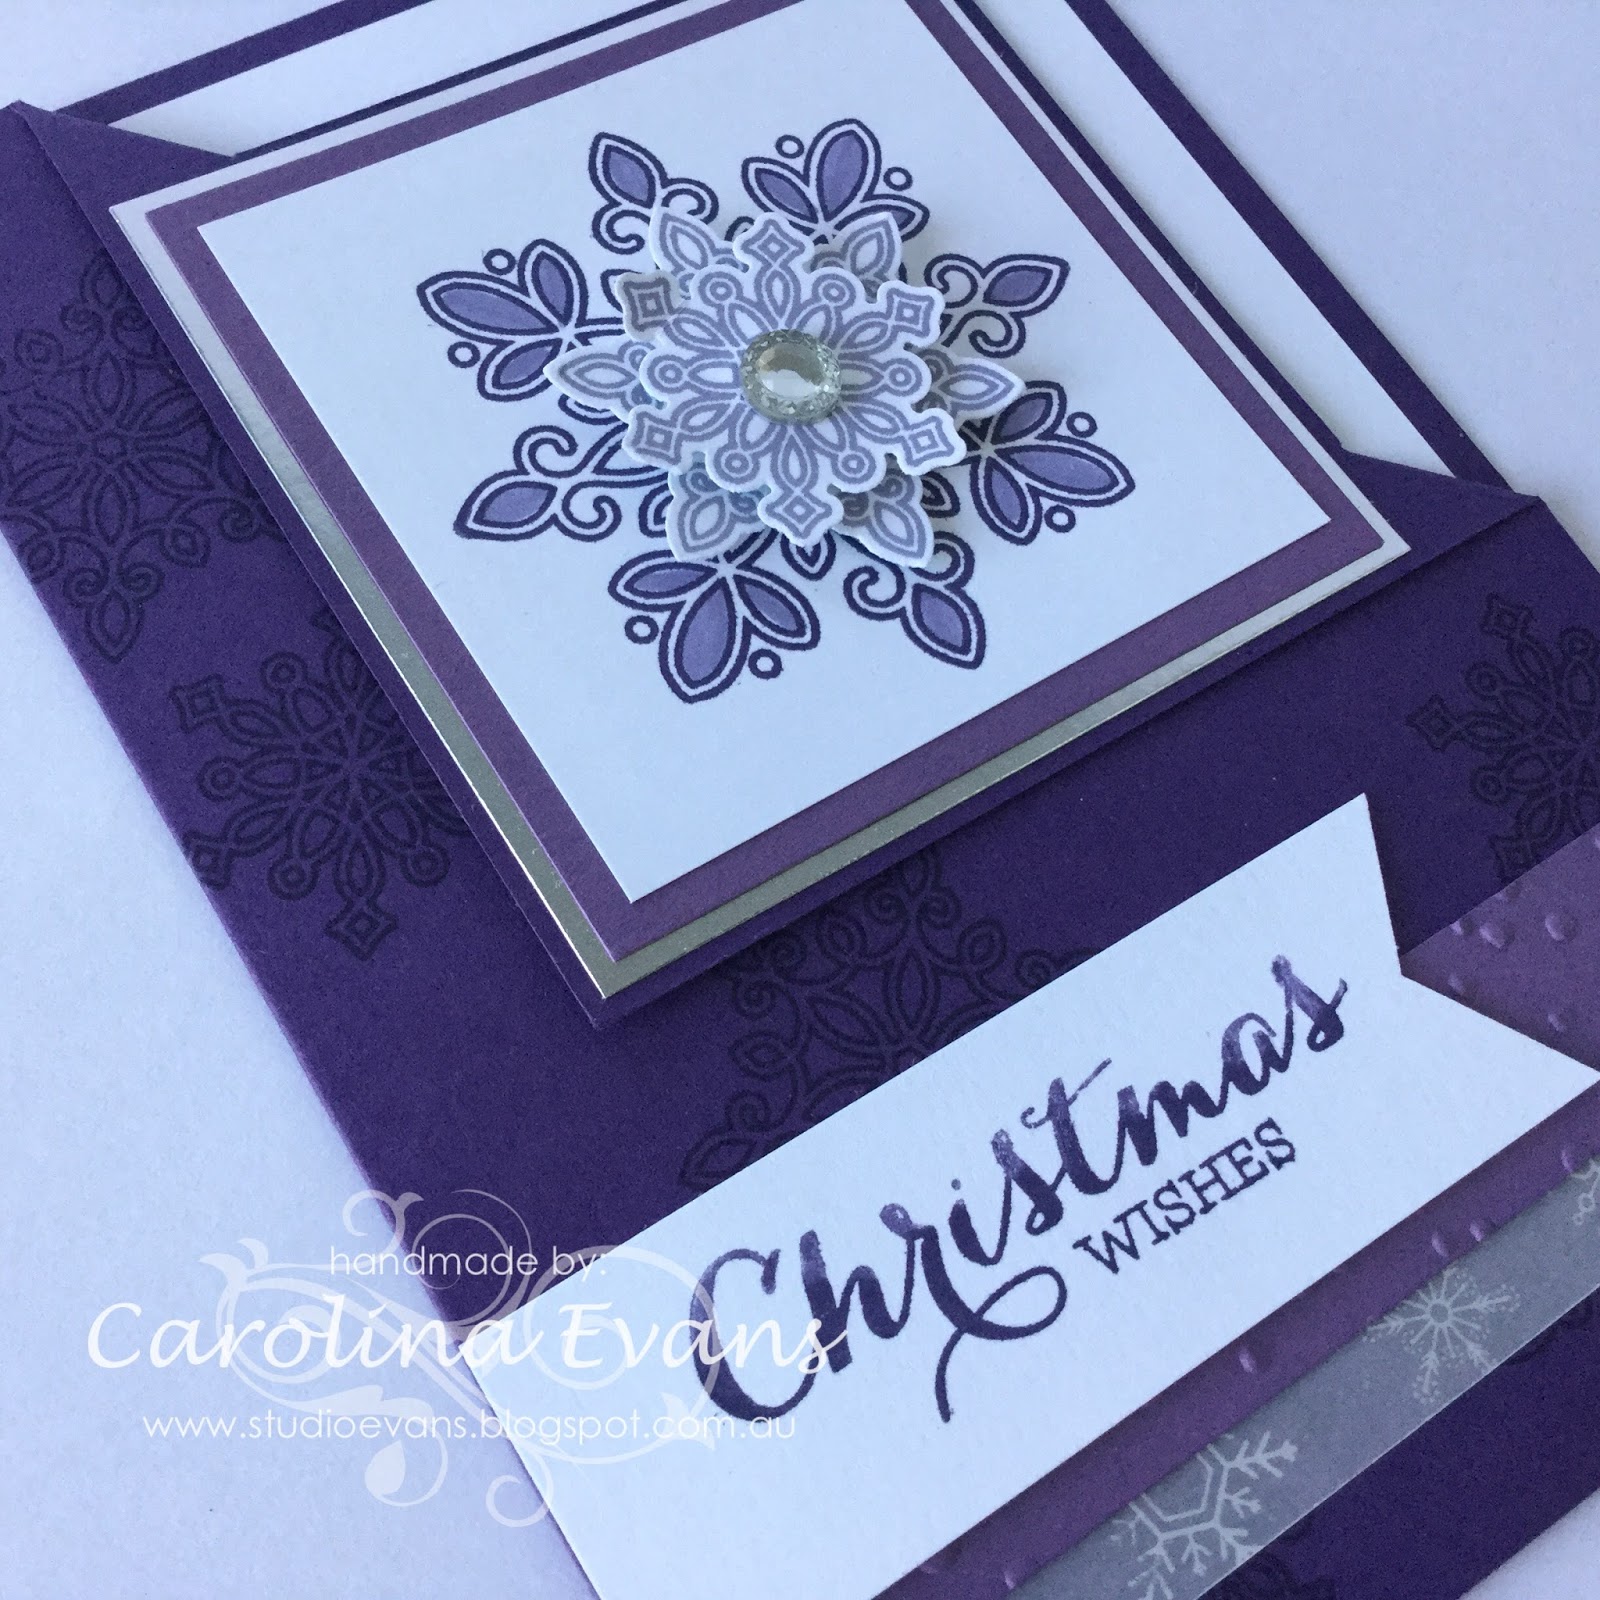
Flurry of Wishes - A Flip Corner card

"Flurry of Wishes" is one of my favourite bundles from this Holiday Catalogue. It was a really popular set. It's not too late in case you would still like to order it. I created this card for a recent swap, I made a few! I love the interesting and easy Corner Flip technique that I learnt from Dawn Olchefske.
I've always loved purple tones at Christmas - in this example it helps to make the card feel warm. Now the snowflakes are just too cute, especially when they can be cut so quickly with the matching punch. I've also used my Wisteria Wonder Stampin' Write marker a couple times here. Once for colouring in the background Snowflake and the other to give the sentiment a bit of pizzazz!

Here are the card measurements so you too can create this card:
  • Watch Dawn's video from the link above to learn more about the Flip Corner. 3" mark.
  • Standard Australian C6 card base in Elegant Eggplant Cardstock (half A4 sheet)
  • Smoky Slate Frame 2-7/8" square
  • Perfect Plum Frame 2-3/4" sqauare
  • Whisper White Panel 2-1/2" square
  • Whisper White Banner 1" wide
Get inspired with this colour swatch, feel free to share and pin it!

Stampin' Up! Supplies
Built for Free Using: My Stampin Blog
Thanks for stopping by and thank you for all your wonderful encouraging comments!

Wednesday, 18 November 2015

It's nearly Christmas! Challenge for #GDP011

"It's beginning to feel a lot like Christmas"
Lets be honest we've been talking about Christmas since the Holiday Catalogue was released in September! And well I must say that I am the most prepared I've ever been with all my Chrissy cards this year. I have lots of cards to share with you over the coming days and weeks, so stay tuned suscribe to receive an update via the blog (register on the right) ---->>>>
I have entered my creations over at the Global Design Project with challenge #GDP011
Here are my cards...
1) Embellished Ornaments - CASE'd from my Crazy Crafter friend Nicole Spicer. This card is a perfect class card. I actually had a class recently and the girls loved making lots of these. Thanks for the inspiration Nic!
We have a production line!!!

2) Ornaments have been cut with the Delicate Ornaments Framelits. This card is similar to above but with a few more embellishments of washi tape and dazzling details!

Stampin' Up! Supplies
Built for Free Using: My Stampin Blog

Coming soon...
 Thanks for stopping by and thank you for all your wonderful encouraging comments!
 

Monday, 12 October 2015

Luscious Vampire Bite for CCREW1015HF


I have created a Triangle Treat Pouch as my 3rd project for the Splitcoast Stampers 'Creative Crew'
http://www.splitcoaststampers.com/gallery/showgallery.php?cat=20742
Punch art is one of my most favourite techniques! I love creating new & unique projects in this way.   Using the vampire chocolates as my inspiration (the inspiration that got eaten actually) I have created a Triangle Treat Pouch.  I scored the bse on my Simply Scored, I have the measurements below for you. This pouch is open on either side, so you can slide a little pouch of treats in very easily.

How to create the Mouth & Teeth
I've used 2 new papers from the Holiday Catty to glitz up this project. The Red Foil sheets were perfect for the Vampire Luscious Lips here. Cut from the new Delicate Ornament Thinlits, I trimmed the top of the ornament off and then cut an oval (Extra-large oval punch) to create one side of the mouth. Arrange & stick the 2 halves together when you're happy with the lip shape.
For the teeth I used the Pansy punch - simply cut up the petals and arrange in the mouth. I free cut the fangs!  I have showcased teeth like this before on another card - click here to see.

Watch out she bites!!
Here are the measurements so you too can create this:
  • Box Base - A4 Basic Black Cardstock- cut to 6" x 10"
  • Box Base scored along the 10" side @ 3/4", 3-3/4", 5", 6-1/4 "& 9-1/4"
  • Black Glimmer Panel - 2-1/2" x 5-3/4"


Stampin' Up! Supplies
Built for Free Using: My Stampin Blog
Thanks for stopping by and thank you for all your wonderful encouraging comments!

Sunday, 20 September 2015

The Crazy Crafters September Blog Hop - Holiday Catalogue Theme

Welcome to the Crazy Crafters Blog for Septemeber. This month we are excited to show off all the Holiday Catalogue goodies!! We hope you find great inspiration from the projects. The full blog lineup below will help you move along from so you see all the projects.

Todays I have a couple of card to share with you that Im really excited about! The main items I have used are the beautiful new Season of Cheer Designer Washi Tape set and the Acorny Thank You stamp set.

Punch Art Acorn Girl - A take on Little Red Riding Hood
I'm excited to share this first card because I have been working hard to find other ways to use the Acorn Builder Punch and I hope you like what I have created!
It all started with me looking at the acorn top and thinking it looked a lot like a Beuret - the rest just feel into place after that. I re-created a kind of Little Red Riding Hood without realsing it!


Go Wild with Washi Card
For my second card I used the washi tapes to bring life to my card. I kept the greeting very low key, so as not to distract you from the strriking background colours and designs.
Get inspired with this colour swatches, feel free to share and pin them!


Stampin' Up! Supplies.
Built for Free Using: My Stampin Blog
Thanks for stopping by and thank you for all your wonderful encouraging comments! There are so many amazing ideas and inspiration you don't want to miss. Please check the line up list to see who is up next!