Showing posts with label Masculine. Show all posts

Sunday, 4 February 2024

Using Designer Series Paper with Lets Craft Together Blog Hop

Welcome back to another Let's Craft Together Blog Hop! This months theme is using DSP - Designer Series Paper! 

I have created a coooool card with the free Trusty Toolbox DSP from this year's SALEABRATION catty and I’ve covered this card from head to toe with paper! I think I've nailed the brief. 
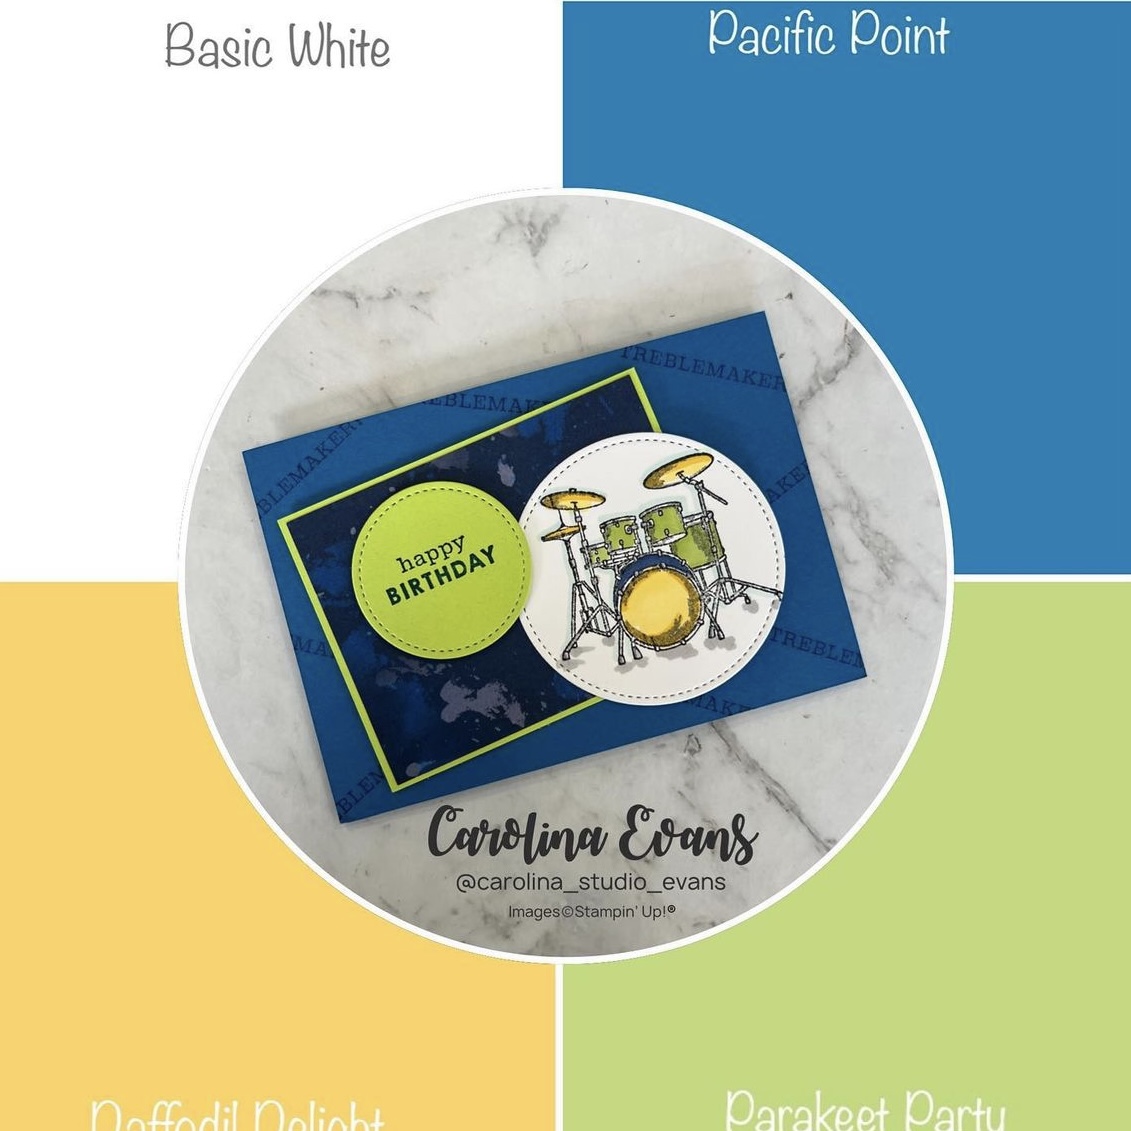
Here's the challenge picture
Lets take a closer look at this card. I've paired the paper with another newbie from the 2024 Mini Catalogue a cool new hybrid embossing folder and die combo for sentiments.
This fun fold card is technically a gatefold .. but the front panels are not equal widths, you can make them as thin or thick are you like! 
Cardbase is half a sheet of A4, scored along the long side at 4cm & 14.5cm

I covered the front panels in Real Red & Lost Lagoon dsp patterns 
For the inside I have carried the idea through- all panels are covered!
The sentiment is from the very NEW Thoughtful Moments Embossing & die cutting bundle.  It's a cool new way to create a sentiment, silly me forgot to get the brayer that is the best way to ink up the emboss folder, so I have used a sponge dauber to add ink. It works well, but the brayer wont ink inside the lettering. 
A gorgeous rich colour combination!
Be sure to continue on the hop below!

Thanks so much for stopping by and hopefully I have inspired your creativity. I love reading your comments, be sure to leave me a quick hello below! 
See all the catalogue products & specials here

Sunday, 30 April 2023

Enjoy the Rhythm - Split Z Fun Fold

Who’s a rock fan? ME & my family are! When this set was released from the new catalogue I knew I had to get it. Now it does use some now retired cardstock, but I didn’t know that at the time of making it. So sorry to see Pacific Point go, we definitely have some amazing blue replacements - Blueberry Bushel & Azure Afternoon to name a couple! 
This stamp set doesn’t have any die cutters but as you’ll see you don’t need cutters for every card. I have used some basic shapes as cut out and stamped within them to highlight this Rhythm set.
This fun fold card is called the Split Z Fold
How cool is it? It’s easy to make too - always a bonus.
You will need x2 A6 (10.5cm x14.9cm) pieces of cardstock along with a long Z folded piece of Basic White cardstock and you’ll SANDWICH them together to make the card. 
For this card I have used 12” white paper however if you only have A4 that’s ok follow below measurements:
• 12” Paper:  9cm x 30.5cm, scored at 9 & 18cm
(3-1/2” x12” scored at 3-1/2 & 7”) or 
• A4 Paper: 9cm x 29.5cm, scored at 7.5 & 16.5cm
(3-1/2 x 11-1/2” scored at 3” & 6-1/2”)
I love adding colour to images with Stampin’ Up! blends… rich and blood colours that really make your images stand out.
A square cut out was the perfect size to stamp x3 Flying V guitars! 
A super fun card that provides lots of room for writing your message and adding lots of fun images. 
It’s like it just keeps folding over new spaces 
A fun and masculine combination - I’ll definitely make this card again in a variety of tones.

If you liked today's post please share your favourite pictures to your Pinterest boards!
Thanks so much for stopping by and hopefully I have inspired your creativity. I love reading your comments, be sure to leave me a quick hello below! 


See all the catalogue products & specials here


Friday, 4 November 2022

Brewed For You Bundle - Beer and lots of it

Today we’re celebrating with beer! Brewed for You is a great bundle - perfect for all the people in our lives. Oh, Ale yes! Let’s also try a new technique - embossing on vellum.
Here's what I used...
Stamp all over the edges in VersaMark first, sprinkle your gold emboss powder, tap off the excess and heat set with the heat tool. Be very careful to not overheat vellum it will shrivel up if too hot - slow and steady is the key, might be easier if I show you - let’s make it! 

Lots of glasses stamped in Pool Party along the inside
A refreshing colour palette to quench our thirst 

Thanks so much for stopping by and hopefully I have inspired your creativity. I love reading your comments, be sure to leave me a quick hello below! 


See all the catalogue products & specials here


Tuesday, 16 February 2021

Happy Birthday with Game On

Today I have 2 special cards for you today! This stamp set is so very cool as you can spruce up the colours to suit absolutely anything. As you can see I have completely changed up the colours here - not just red, black and white which is what you would typically find on a deck of cards. I have also included a fancy fold (bottom right).

The standard C6 card has some background stamping in Pacific Point ink, then some strip layers behind the white sentiment also stamped in Pacific Point. To finish off the front I stamped and fussy cut the deck of cards images x3 in different colours. 

Dont forget the inside panel... lots of dice in different colours 

For this fancy fold you will need a full A4 sheet of cardstock.  Cut the height of your card from short side to 14.9cm, the remaining piece will become your belly band - you can choose to cut the belly band a little slimmer if you like. Score the cardbase at 3.5cm, 14cm & 24cm. Now its time to decorate your card. 

I chose to add some panels in the colour scheme stamping them wth the images in the Game On Stamp Set- I think I used every single stamp! 

Don’t forget the inside panel! Position your inside panels like a hand of cards. 

Here's a birds-eye of both sides of this card, where the panels go and where to stamp. (Stay tuned for a YouTube Tutorial, they are coming soon)

The colours for this card were thanks to the people over at #sucolourchallenge with their January colour challenge. I loved it - thank you!

If you liked today's post please share your favourite pictures to your Pinterest boards!

Thanks so much for stopping by and hopefully I have inspired your creativity. I love reading your comments so show me some blog love & leave me a quick hello below! 

https://feedburner.google.com/fb/a/mailverify?uri=CarolinaEvans-StampinUpDemonstratorMelbourneAustraliahttp://www3.stampinup.com/ECWeb/default.aspx?dbwsdemoid=4005871https://ida.stampinup.com/?demoid=4005871https://www3.stampinup.com/ECWeb/ItemList.aspx?categoryid=300100&dbwsdemoid=4005871
See all the catalogue products & specials below here


Friday, 20 March 2020

Ink it! Stamp it! Blog Hop - Reverse Easel Card with Rooted in Nature #inkitstampit


Welcome to the Ink it! Stamp it! Blog Hop. The Design Team have been busy making projects inspired by our THANK YOU theme. The team have all created amazing projects to share with us tonight. The full line up below will guide you through all the projects and we'd love to hear from you on what your favourite is?

I’ve created a reverse easel card and it’s so easy! The card base (navy) is an A4 sheet cut lengthway, scored in half @14.9cm & @7.5cm.
Then add a panel to the front (crushed curry) and a tab to the top edge. 

This is a great way to use your patterned DSP too! Pretty insides.
Add a stamped writing panel to the back of the card and you’re done

If you liked today's post please share your favourite pictures to your Pinterest boards!

Thank you so much for joining us today. We hope that you'll join us again next month to see our next projects. I'm Carolina and to keep hopping around see the list below to see who is up next.


Full Blog Line Up


https://feedburner.google.com/fb/a/mailverify?uri=CarolinaEvans-StampinUpDemonstratorMelbourneAustraliahttp://www3.stampinup.com/ECWeb/default.aspx?dbwsdemoid=4005871https://ida.stampinup.com/?demoid=4005871https://www3.stampinup.com/ECWeb/ItemList.aspx?categoryid=300100&dbwsdemoid=4005871